Application & Training
Tack Free
Tack-free is when you allow a layer of Cerakote to partially cure (ambiently or thermally) and become dry to the touch (not tacky). Checking for Tack-Free is practiced when parts need to be handled before a full cure.
ACHIEVING TACK FREE WITH H SERIES AND ELITE SERIES
(THERMAL CURE)
After applying a layer of Cerakote, parts are ambiently flashed and placed into a preheated oven set to 150°F-180°F. Tack-free time will be achieved within 10-30 minutes, depending on the color and density of the substrate; this process for reaching Tack Free is known as Flash Curing.
HOW TO CHECK FOR TACK FREE
Once parts are coated and placed into an oven for Flash Curing, set a timer for 10 minutes. Following the 10-minute Flash Cure, check the part for Tack Free by using your finger and lightly pressing the surface in an inconspicuous spot. If the part is still tacky and leaves an imprint, continue to check every 5 minutes until no imprint is left behind.
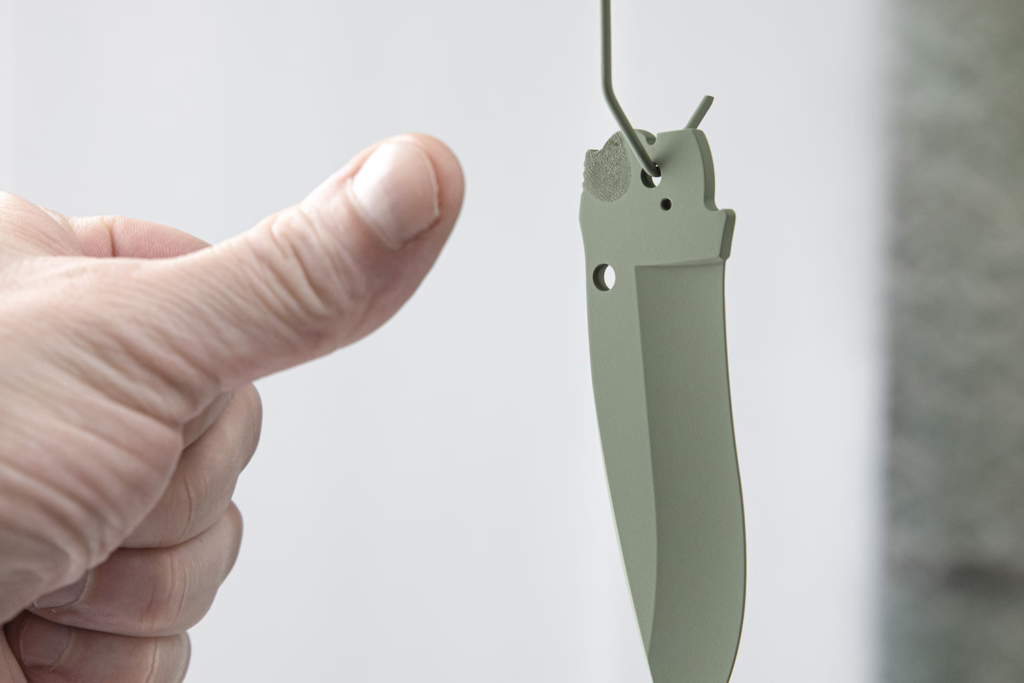
PART UNDER-FLASHED, IMPRINTED FROM THE FINGER PRESS TEST.

PART FLASH CURED TO TACK-FREE
Once Tack-Free, remove the parts from the oven and allow them to cool before handling or adding additional coating layers.
ACHIEVING TACK FREE WITH C SERIES AND GLACIER SERIES
(AIR CURE)
After applying a layer of Cerakote, parts are ambiently flashed to the point of being Tack-Free. Tack-Free time will be achieved within 45 to 60 minutes, depending on the color and ambient temperatures.
HOW TO CHECK FOR TACK FREE
Once a final coat has been applied, set a timer for 45 minutes to allow parts to ambiently flash. Following the 45-minute ambient flash, check the part for Tack-Free by using your finger and lightly pressing the surface in an inconspicuous spot. If the part is still tacky and leaves an imprint, continue to check every 5 minutes until no imprint is left behind.
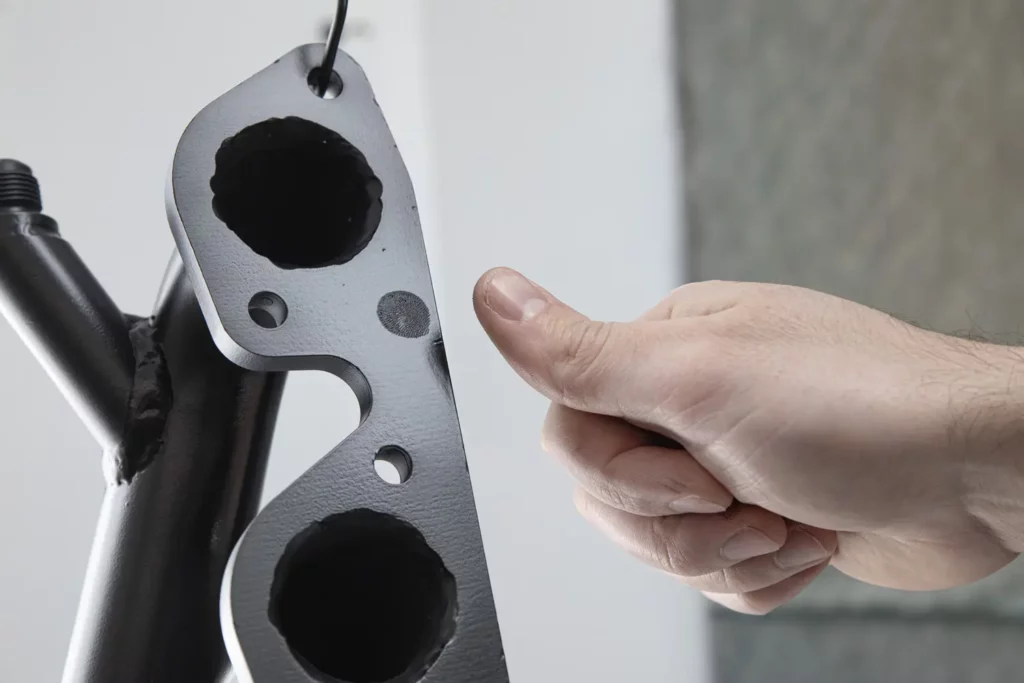
PART UNDER-FLASHED, IMPRINTED FROM THE FINGER PRESS TEST.
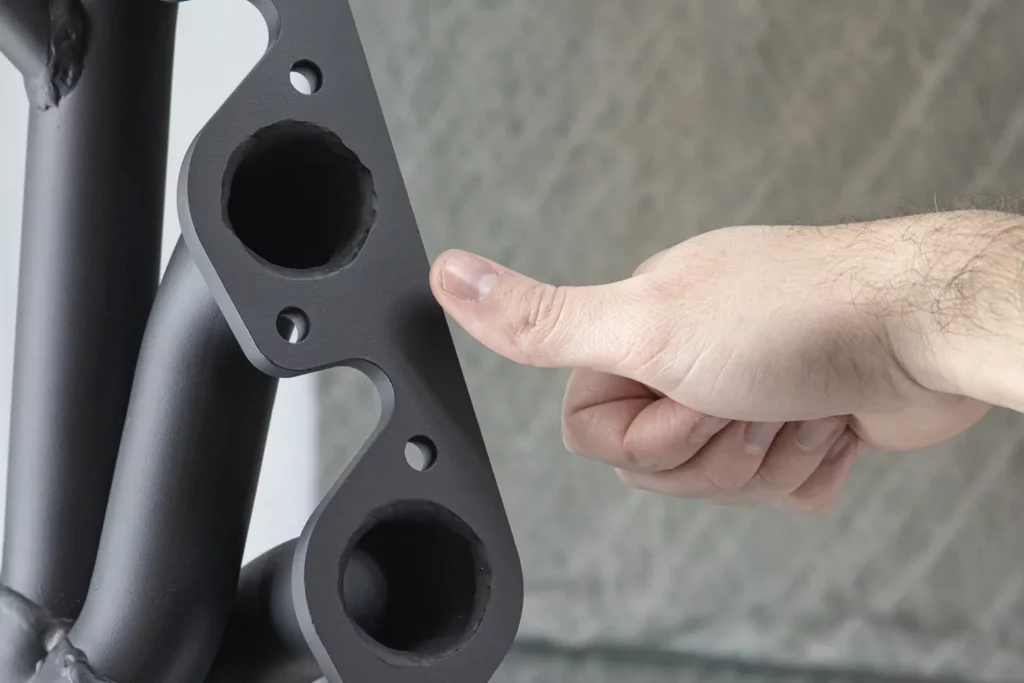
PART UNDER-FLASHED, IMPRINTED FROM THE FINGER PRESS TEST.
Once Tack-Free, the parts are ready for handling or adding additional coating layers.
WHEN IS ACHIEVING TACK FREE IMPORTANT?
CUSTOMIZATION
INTER-COAT ADHESION
When layering colors with custom projects, checking for Tack-Free in between coating layers is imperative for optimal Inter-coat adhesion. Allowing the coating to cure beyond Tack-Free can lead to poor inter-coat adhesion.
APPLYING VINYL STENCILS
During the color layering process, you will need to achieve tack-free when adding or removing vinyl stencils. If a part is not Tack-Free, this can lead to finish defects or coating delamination.
HANDLING
If a part is not tack-free before handling, you will leave imprints/defects behind that will be present once cured. Always ensure your part is tack-free before handling.